 Seattle
 New-Construction Windows for Queen Anne Homes
Queen Anne sits high above the water on one of Seattle's most exposed hilltops, and that elevation cuts both ways. The views are part of why people build here, but the same wind that clears the sky also drives rain sideways into window openings that aren't detailed correctly. When we talk about "new-construction windows," we mean windows installed into a wall that's being built from the studs out — with the housewrap, flashing, and nailing fin all installed together as one integrated system, as opposed to a retrofit or "pocket" replacement dropped into an existing frame. On a new build or a full addition in Queen Anne, doing this correctly the first time matters more than almost anywhere else in King County, because the hill catches weather that flatter, more sheltered neighborhoods simply don't see as often.
This page is about that one job, done right, in this one neighborhood: what Queen Anne's climate demands from a window opening, what a correct new-construction install actually involves, and why the sequencing matters as much as the window itself.
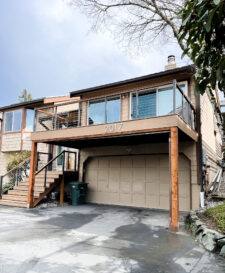
Why Queen Anne's Climate Is Harder on Window Installations
Seattle's marine climate means near-constant moisture exposure for a good chunk of the year, but Queen Anne adds a few local wrinkles on top of that general Puget Sound reality:
- Wind-driven rain: Queen Anne's elevation and exposure to weather coming off the Sound and Elliott Bay means rain doesn't just fall here — it gets pushed horizontally against west- and south-facing walls, which puts real pressure on window flashing details that would barely get tested on a sheltered lot.
- Salt-influenced air: Proximity to saltwater accelerates corrosion on exposed metal components — hardware, screws, and unprotected flashing — over the life of the window if the wrong materials are used.
- Long moss and mildew season: Mild, wet winters and slow-drying shade on north-facing elevations create long stretches where sills, trim, and sealant joints stay damp. Moss and algae don't just look bad; they hold moisture against the building longer than a dry surface would.
- Older housing stock nearby: Many Queen Anne lots sit next to century-old homes, and a lot of new construction and additions here are squeezed onto narrow lots with tight setbacks, which affects scaffolding, staging, and how much lead time we need to plan a clean install.
None of this means new-construction windows are riskier in Queen Anne than elsewhere — it means the margin for error in the flashing and sealing details is smaller, and skipping steps shows up faster.
What a Correct New-Construction Window Install Actually Involves
A window is only as good as the opening it sits in. On new construction, we're building that opening from scratch, which is actually an advantage — we control every layer, instead of working around whatever was done decades ago.
The Layers, in Order
- Rough opening framing — sized and squared to the window manufacturer's exact tolerances, not "close enough."
- Water-resistive barrier (housewrap or building paper) — lapped correctly so water sheds down and out, never into the wall.
- Sill pan flashing — a sloped, sealed pan at the bottom of the opening that catches any water that gets past the window and directs it back outside instead of into the framing.
- Window set with nailing fin fastened per manufacturer spec — over-driven or missing fasteners are one of the most common causes of early window failure we see on inspections.
- Flashing tape or flexible flashing at the jambs and head — integrated shingle-style with the housewrap so every layer overlaps the one below it.
- Head flashing with a drip cap — this is the detail that matters most on a wind-driven-rain wall, since it breaks the water's path before it ever reaches the window head.
- Interior and exterior sealant — compatible with both the window frame material and the cladding, applied in a continuous bead with no gaps.
Skip or rush any one of these and the window itself — no matter how good the brand — becomes the weak point in the wall. This is why we treat window installation as a flashing and water-management job first, and a carpentry job second.
Getting the Sequencing Right With Your Builder
On new construction, window installation isn't a standalone task — it has to be coordinated with framing, housewrap, and siding crews. We work directly with your general contractor or builder to make sure:
- Rough openings are framed to the correct dimensions before we're on site, avoiding delays or field modifications.
- Housewrap goes on before window set, not after, so the water-shedding layers are in the right order.
- Siding and trim crews don't cover our flashing details until they've been checked.
- Any changes to window sizes or locations get communicated before openings are framed, not after.
Choosing Windows for a Queen Anne Elevation
The window unit itself matters less than the installation, but it's still a real decision. A few honest trade-offs worth knowing before you spec windows for a hilltop, wind-exposed lot:
| Factor | What to Know |
|---|---|
| Frame material | Vinyl, fiberglass, and wood-clad units all perform differently in wet, salt-influenced air. Fiberglass and quality vinyl resist corrosion well; wood-clad units look great but need consistent maintenance on any exposed wood or seams. |
| Glazing / low-E coating | Double-pane with a low-E coating is close to standard for our climate now; it helps with both energy performance and comfort near large glass areas that catch wind. |
| Hardware and fasteners | Stainless or corrosion-resistant hardware costs a little more up front and matters more here than in drier, inland parts of King County. |
| Orientation on the lot | West- and south-facing openings on an exposed elevation deserve extra attention to head flashing and sealant detail; north-facing openings need attention to slow-drying moisture and moss. |
| Sill design | A sloped sill with a proper pan flashing sheds water actively rather than letting it pool, which matters more on a hill that takes rain at an angle. |
We're happy to work with whatever window line your architect or builder has already specified — our focus is making sure the installation matches the exposure of your specific elevation, not steering you toward one brand over another.
Why the "Extras" Aren't Optional Here
On a calmer, more sheltered lot, a contractor could probably get away with skipping a sill pan or using standard housewrap tape instead of a proper flashing membrane, and it might not show up as a problem for years. On an exposed Queen Anne elevation, driving rain finds shortcuts fast. We've seen enough water intrusion cases in older homes on the hill — caused by missing sill pans, reversed flashing laps, or gaps in head flashing — to know these aren't theoretical risks. They're the actual failure points that show up as staining, soft trim, or mold behind drywall a few winters after a rushed install.
That's why every new-construction window we install gets a sill pan, integrated flashing, and a documented sequence — regardless of budget or schedule pressure from the job site.
Our Process on a Queen Anne Job
- Plan review: We look at window schedules and elevations before framing is finalized, flagging any openings on exposed faces that need extra flashing detail.
- Site coordination: We schedule around your framer and siding crew so window installation happens at the right point in the build sequence, not squeezed in around other trades.
- Flashing and sill pan install: Done to manufacturer specifications for the specific window line being used, adjusted for the wall's orientation and exposure.
- Window set and fastening: Fasteners driven to spec, spacing checked, unit checked for square and level before final fastening.
- Sealant and trim-out: Interior and exterior sealed with compatible products, exterior trim installed to shed water away from joints.
- Walkthrough: We review the completed openings with you or your builder before siding closes them in, since that's the last point anything can be corrected without tearing into finished work.
A Quick Pre-Install Checklist for Homeowners and Builders
If you're planning new construction or a major addition in Queen Anne, these are worth confirming before window installation begins:
- Rough openings match the exact window schedule dimensions — not approximate.
- Housewrap or building paper is installed and lapped correctly before window set.
- Sill pan flashing is specified for every opening, not just ones on the weather side.
- Fastener type is corrosion-resistant, appropriate for a salt-influenced coastal climate.
- There's a clear plan for who inspects flashing before siding closes it in.
- Window orientation on exposed elevations (especially west and south walls) has been discussed with the installer, not just the architect.
Working With a Crew That Knows the Hill
Queen Anne's mix of steep lots, tight setbacks, older neighboring construction, and genuine wind-and-rain exposure means a window installer who mostly works flatter, more sheltered parts of Seattle may not have a feel for how much margin these details actually need. We work in this neighborhood regularly, which means we already know how the weather behaves on different sides of the hill, how to stage equipment on narrow lots without disrupting neighbors, and how to coordinate cleanly with the other trades on a King County new-construction schedule. That familiarity shows up less in any one dramatic decision and more in a dozen small ones — flashing lap direction, sealant choice, fastener spacing — that add up to windows that hold up through Seattle's wet season after wet season.
If you're planning new construction or an addition in Queen Anne and want windows installed the way this hill actually requires, we're glad to walk the plans with you. Reach out for a free, no-pressure estimate using the form below.