 Seattle
 New Roof Installation Built for Beacon Hill's Conditions
Beacon Hill sits up above the rest of Seattle, which means homes here catch weather a little differently than houses down in the valleys or along the waterfront. The elevation and tree cover bring their own mix of wind exposure, shade, and moisture, and over the course of a King County winter that combination is hard on a roof. Whether you're replacing a roof that's reached the end of its service life or dealing with one that's failed early, the goal of a new roof installation here is the same: put on a system that's actually matched to this neighborhood's climate, not a generic install that happens to be installed in Seattle.
A lot of the roofs we see failing early in this area weren't bad roofs on day one — they were roofs installed without enough attention to ventilation, flashing detail, or moss resistance. That's the gap we try to close.
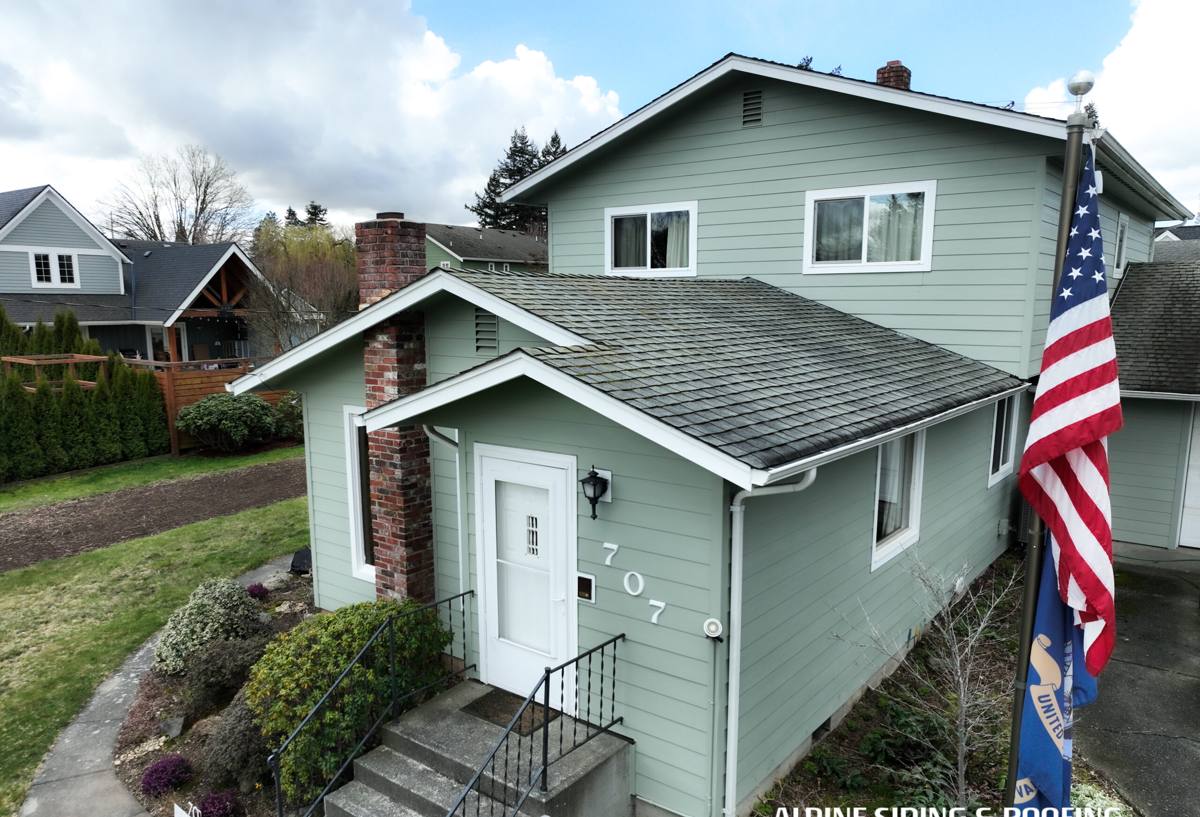
Why Beacon Hill Roofs Take a Beating
Seattle's Puget Sound location means homes across King County deal with salt-laden air moving in off the water, long stretches of driving rain, and a moss season that can run most of the year in shaded spots. On Beacon Hill specifically, mature tree canopy on many lots keeps roof surfaces shaded and damp longer after a storm than a roof out in the open sun. That extra dwell time for moisture is exactly what moss, lichen, and algae need to get established.
The three big stressors
- Driving rain: wind-driven rain doesn't just fall straight down — it pushes water sideways and upward under shingle edges, which is why flashing and underlayment quality matter more here than in drier climates.
- Salt air: metal fasteners, flashing, and vents that aren't rated for coastal exposure corrode faster, which shortens the life of the parts of the roof that keep water out at the seams.
- Moss season: moss holds moisture against the roof surface, works into shingle granules and seams, and can lift edges over time if it's never treated or removed.
None of these stressors are unique to Beacon Hill, but the combination of hillside wind exposure and heavier tree shade on a lot of the streets up here means a roof that would perform fine in a drier, more open part of the county can underperform on this hill if it wasn't specified correctly.
What a Correct New Roof Installation Actually Involves
"New roof" gets used loosely. A correct installation is a sequence of steps, and skipping or rushing any one of them is where premature leaks and short roof lifespans usually come from.
Tear-off and deck inspection
We remove the old roofing down to the deck rather than layering over it. That's the only way to actually see the condition of the sheathing underneath — soft spots, rot, or old water damage don't show up until the old material is off. Any damaged decking gets replaced before anything new goes down; installing new roofing over a compromised deck just hides the problem for a few years.
Underlayment
This is the water-resistant layer between the deck and the visible roofing, and in a climate with this much sustained rain, it's not a place to cut corners. We use synthetic or ice-and-water shield underlayment in the areas most exposed to wind-driven rain and ice damming — eaves, valleys, and around penetrations — because a single layer of felt alone doesn't hold up well over years of Pacific Northwest weather.
Flashing
Flashing at chimneys, skylights, walls, and valleys is where the majority of roof leaks actually originate — not in the open field of shingles. Correct flashing means new metal, properly lapped with the underlayment and roofing material so water is always directed downhill and off the roof, never trapped behind a seam.
Ventilation
A roof deck that can't breathe traps heat and moisture in the attic, which shortens shingle life from underneath and can contribute to condensation issues in our wet climate. Balanced intake (soffit) and exhaust (ridge or roof vents) ventilation is part of a correct installation, not an upsell.
Ridge and hip detail
The ridge is one of the highest-wind-exposure areas on the roof. We use ridge cap products and fastening patterns rated for the wind conditions common to hillside sites like Beacon Hill.
Material Choices and What They Mean for This Climate
There's no single "best" roofing material — the right choice depends on your home's roof pitch, your budget, how much shade the roof sits in, and how long you plan to stay in the home. Here's how the common options compare for a Beacon Hill install specifically.
| Material | Moss/moisture resistance | Typical lifespan here | Maintenance burden |
|---|---|---|---|
| Asphalt composition shingle (standard) | Moderate — benefits from algae-resistant granules | 20–25 years | Periodic moss treatment on shaded sections |
| Asphalt composition shingle (impact/algae-resistant) | Good | 25–30 years | Lower, but not maintenance-free |
| Standing seam metal | Very good — sheds moisture quickly, little surface for moss to grip | 40–50+ years | Low; occasional fastener and sealant check |
| Cedar shake/shingle | Requires active upkeep in shaded, damp areas | 20–30 years with maintenance | Highest — regular treatment and inspection needed |
On shaded, tree-covered lots common to this neighborhood, we usually steer homeowners toward algae-resistant shingles or metal over untreated cedar, simply because cedar in a damp, shaded microclimate demands a level of ongoing maintenance a lot of homeowners don't want to keep up with. That's a maintenance and moisture-behavior tradeoff, not a knock on the material itself — cedar looks great and performs fine when it's kept up.
Cost Factors Homeowners Should Actually Weigh
Roofing quotes vary widely for real reasons, not just markup. The main variables we walk homeowners through are:
| Factor | Why it moves the price |
|---|---|
| Roof pitch and access | Steeper roofs and hillside lots with limited staging area take longer and require more safety equipment |
| Layers to remove | Tear-off of multiple existing layers adds labor and disposal cost |
| Deck condition | Rotted or soft sheathing found during tear-off requires replacement before new roofing goes on |
| Material selection | Standard shingle, algae-resistant shingle, and metal all carry different material and labor costs |
| Ventilation upgrades | Adding or correcting intake/exhaust ventilation where the existing system is inadequate |
| Flashing scope | Number of penetrations, valleys, and wall intersections that need new metal |
We'd rather walk a roof in person and give you a number based on what's actually up there than quote a price over the phone based on square footage alone. Broadly, a full tear-off and reroof on a typical single-family home runs from the high single-digit thousands into the low-to-mid five figures depending on the factors above — but the only accurate number is one based on an on-site look at your roof.
Our Process, Start to Finish
- On-site inspection: we walk the roof (or use a drone/ladder assessment where access is tight) and document deck condition, flashing points, ventilation, and moss/moisture patterns.
- Written estimate: a clear scope of work and price, with material options explained so you know what you're choosing between and why.
- Permitting: reroofing in Seattle typically requires a permit through the city; we handle that paperwork so it's not on you.
- Tear-off and deck repair: old roofing removed, deck inspected, any damaged sheathing replaced.
- Underlayment and flashing installation: the water-management layer that does most of the real work over the life of the roof.
- Roofing material installation: installed to manufacturer specification and local code, with attention to wind-rated fastening given hillside exposure.
- Ventilation check and final walk-through: we confirm intake and exhaust venting is balanced, clean up the site, and walk the finished roof with you.
Why a Crew That Already Works Beacon Hill Matters
Roofing crews that work all over the greater Seattle area learn general Pacific Northwest roofing practices, but crews who spend real time on Beacon Hill specifically pick up on things that are easy to miss otherwise: which streets have the most persistent shade and moss buildup, how hillside wind patterns tend to hit certain roof orientations harder, and how older housing stock in this part of the city was originally framed and vented — which affects what a correct retrofit looks like today. That local pattern recognition doesn't replace a proper on-site inspection, but it does mean fewer surprises and a scope of work that's realistic from the first estimate.
It also matters for scheduling and logistics. Hillside lots with limited street parking or tight side-yard access need a crew that's planned around those constraints before the dumpster and material delivery show up, not after.
Signs You Need a New Roof, Not a Repair
- Multiple leaks in different locations, rather than one isolated spot
- Shingles that are curling, cracking, or losing granules across large sections
- Visible sagging in the roofline or deck
- Moss or algae covering large sections that keeps returning after cleaning
- A roof already at or past the manufacturer's expected service life
- Daylight visible through the roof deck from inside the attic
If only one of these applies and the rest of the roof is sound, a targeted repair may still make sense. We'll tell you honestly if that's the case rather than pushing a full replacement you don't need yet.
After Your New Roof Goes On
A correct installation dramatically cuts down on maintenance, but no roof in this climate is truly maintenance-free. A short list of upkeep that actually extends the life of a new roof here:
- Keep gutters clear so water isn't backing up under the roof edge during heavy rain
- Trim back tree limbs that overhang the roof to reduce shade and debris buildup
- Have moss growth treated or removed before it establishes rather than after
- Schedule a visual inspection every year or two, especially after a windstorm
- Address any flashing or sealant issues promptly rather than waiting for an active leak
If your roof is showing its age or you're planning ahead for a replacement, we're glad to walk it with you, explain what we see in plain terms, and put together a written estimate — no pressure, no obligation. Use the form below to request a free estimate for your Beacon Hill home.